
IMPORTANT: For those of you are looking to buy cubes, we have a sales page here!
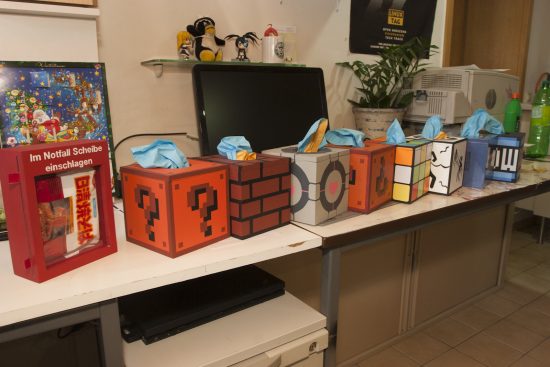
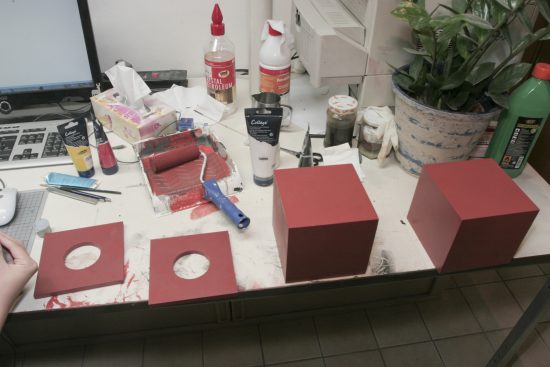
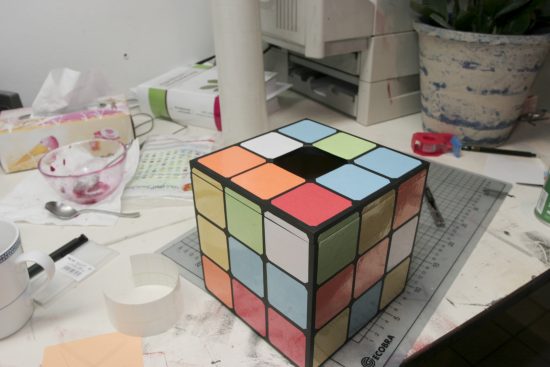
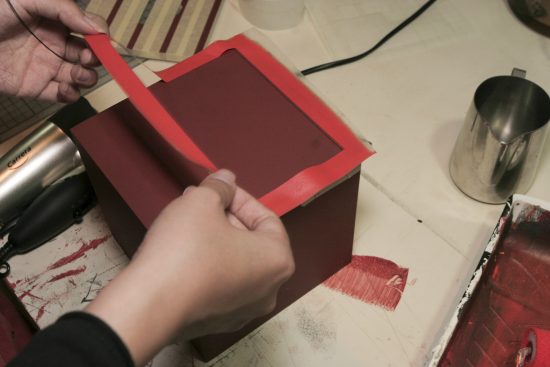
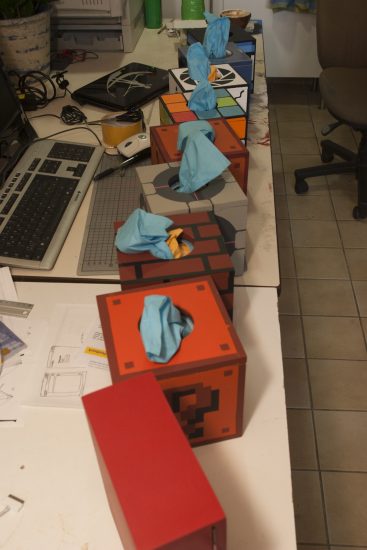
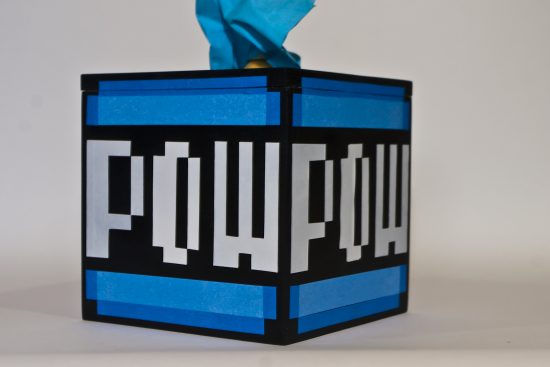
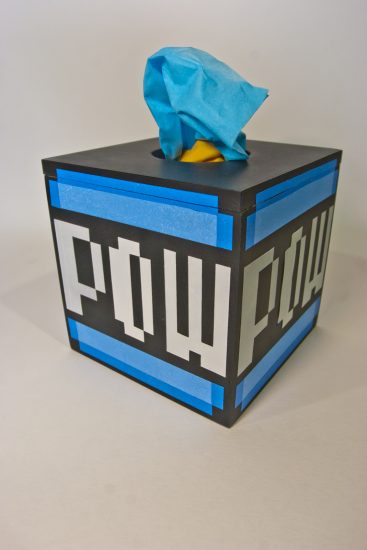
We happen to be fans of Big Bang Theory and in one episode, we spotted a Rubik’s Cube tissue box somewhere in their geek apartment (back in October?). Of course they’re not the first one to have this idea but we got curious and were convinced they would make awesome Christmas gifts for our friends. In the end we overdid it a little and made every cubic (and geek-ish) item we could think of. The result? A certain annoyed person who had to cut all those small pieces of wood for us (he paid us back with cutting them half-heartedly and not so precise as usual but no hard feelings..). Every cube made in a different way (some painted, stenciled, glued,..). Many gifts and actually none left for ourselves to keep and no drive to make more, … as always.
Now this wouldn’t be a real Kanojo.de blog entry if we didn’t tell you how it works, so here goes:
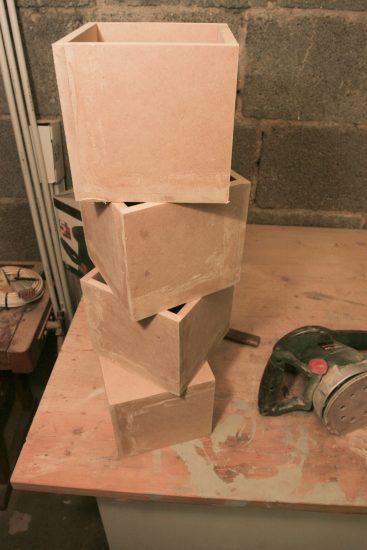
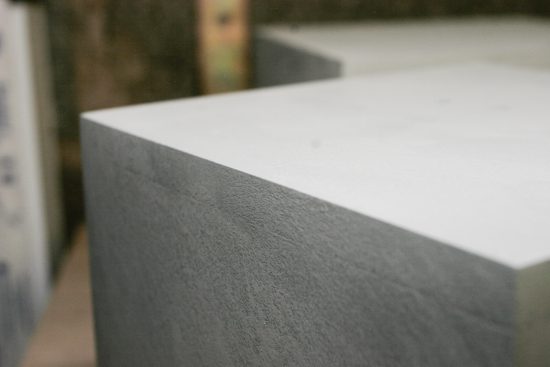
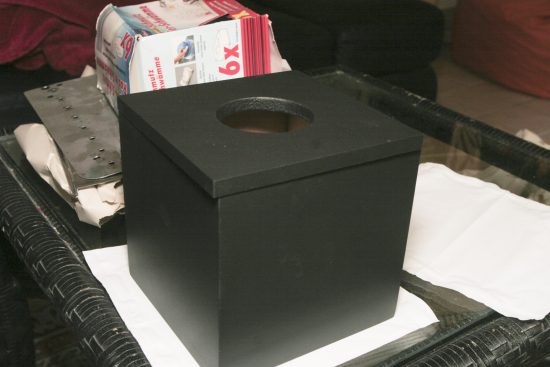
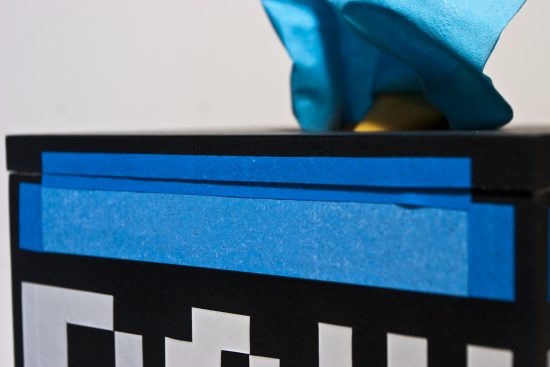
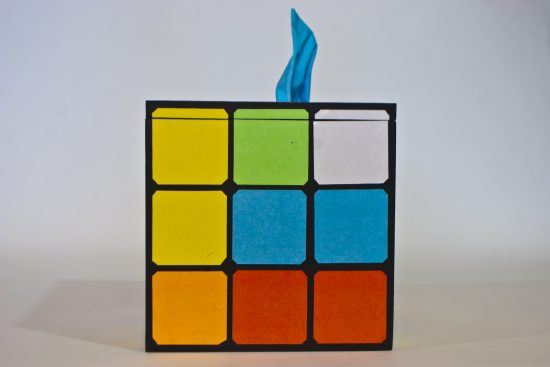
Use 1 cm MDF and for one tissue box you’ll need: 2 x 15 cm x 15 cm and 4 x 14 cm x 13 cm
The bigger ones are for the top and bottom.

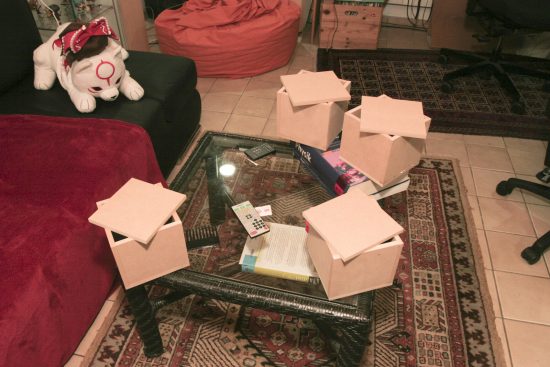

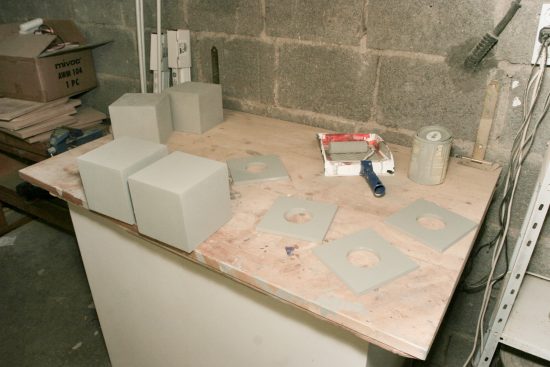
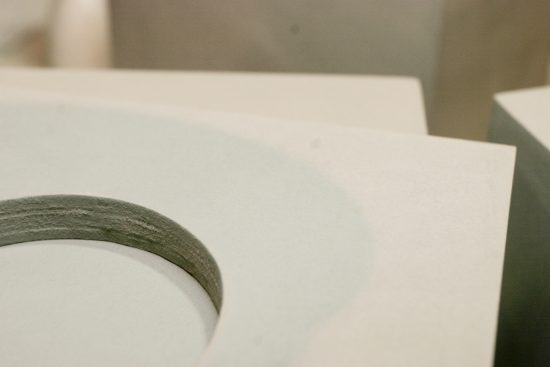
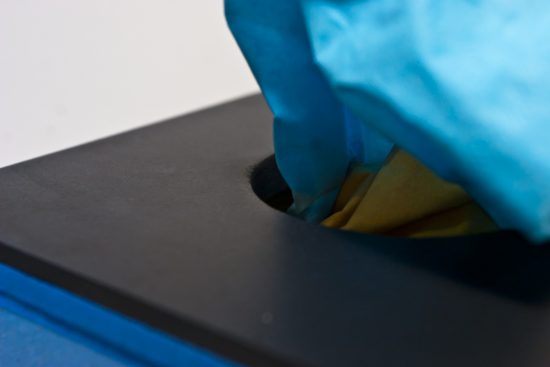
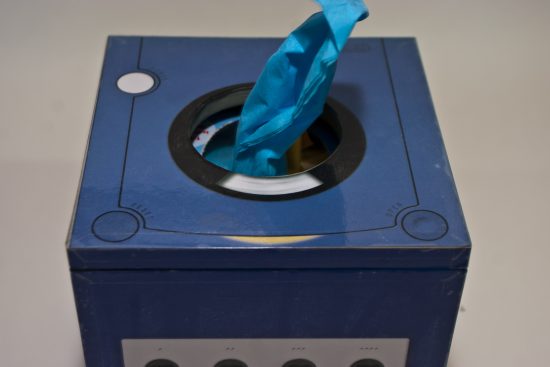
Make the hole about 6,5 cm in diameter.
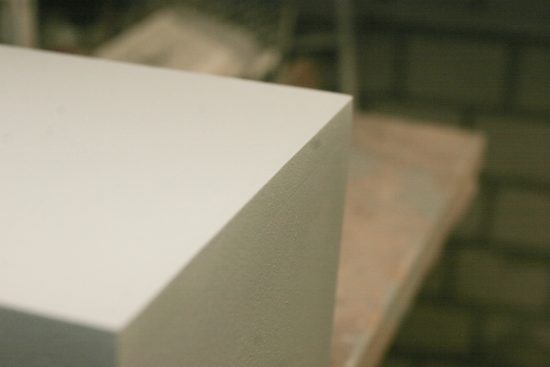
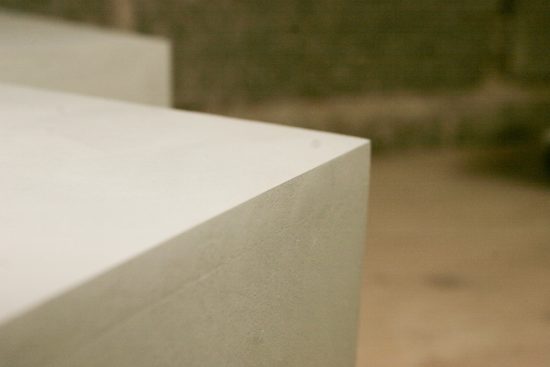
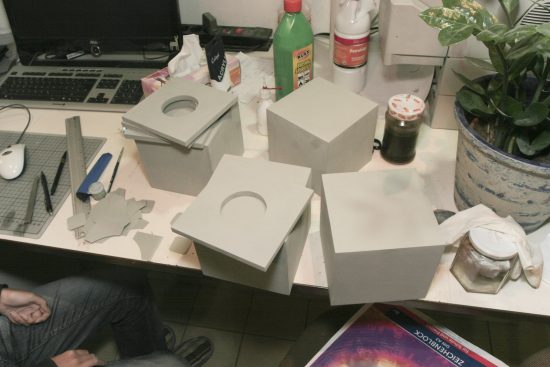
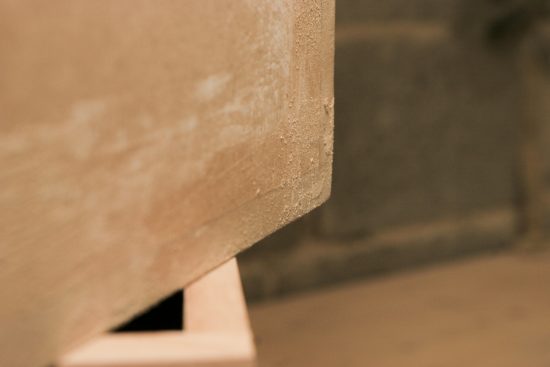
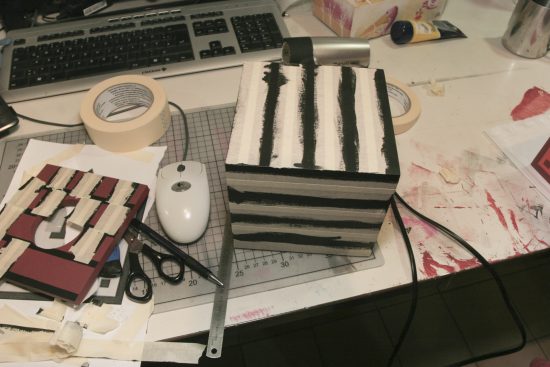
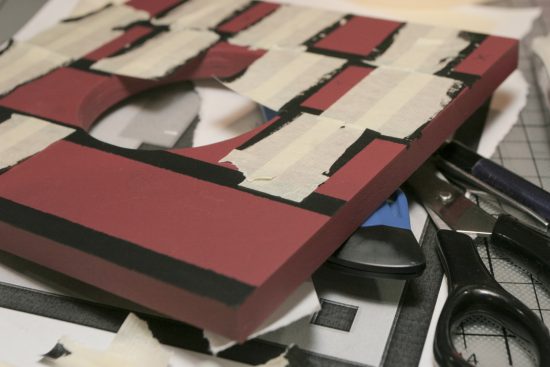
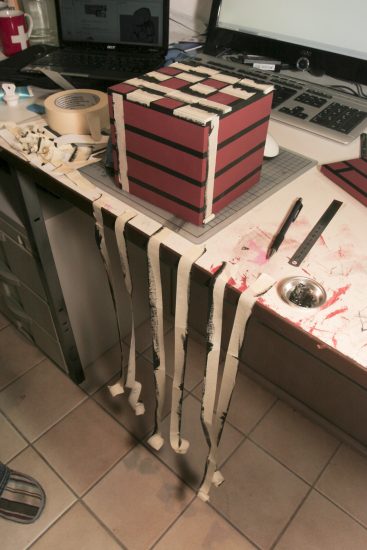
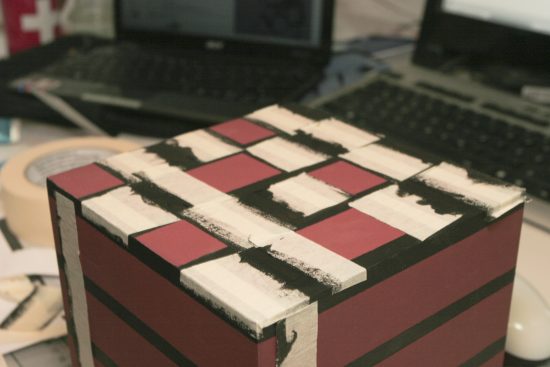
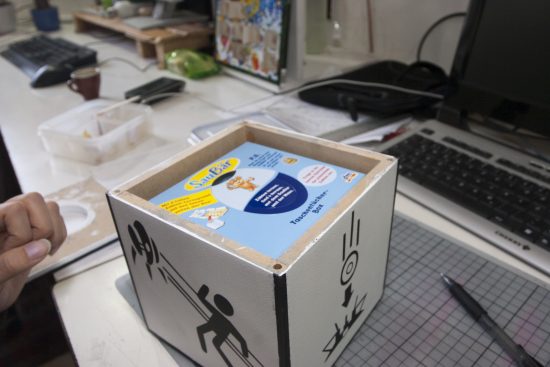
It’s all mixed up photos now. I’ll note which tissue box is currently being worked on in which picture.


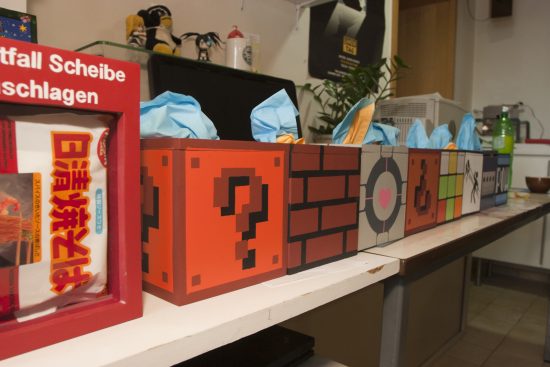

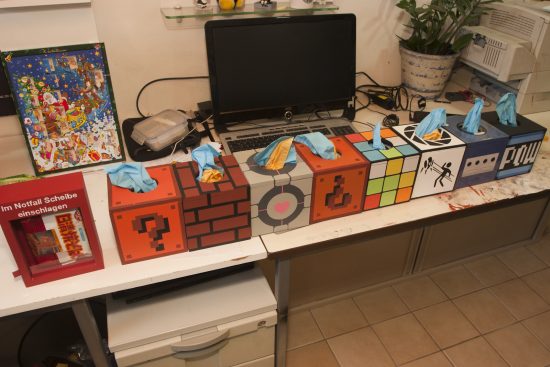
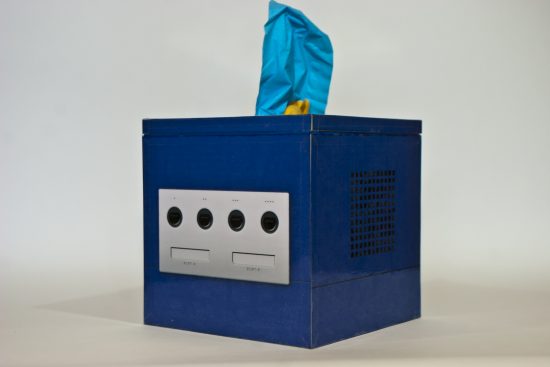
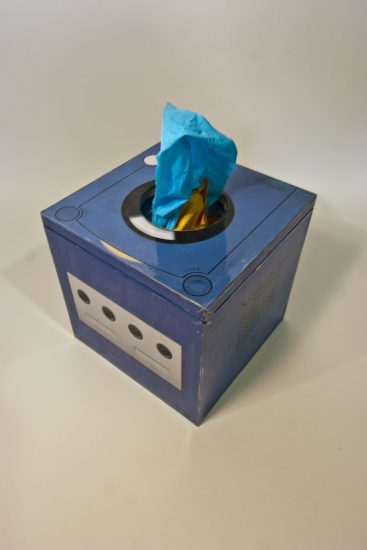
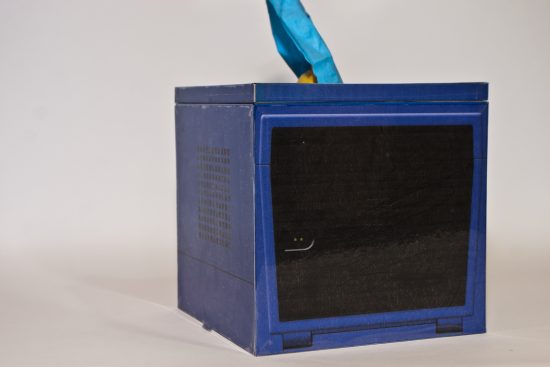
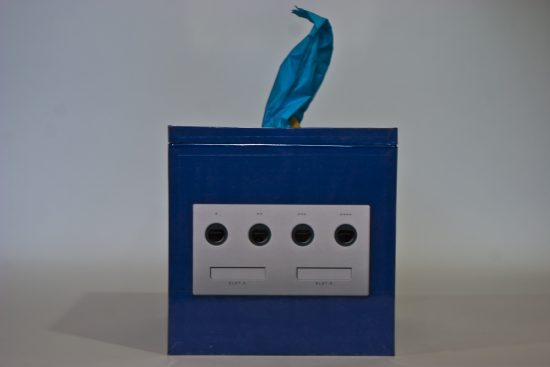
Game Cube
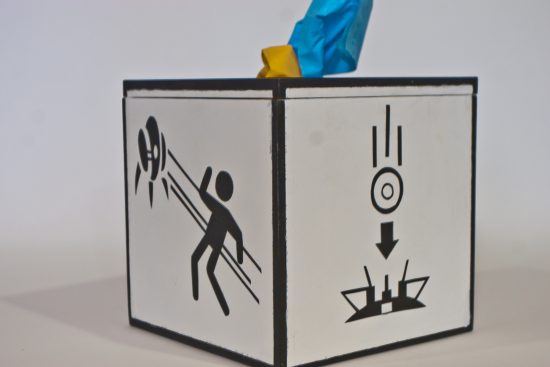
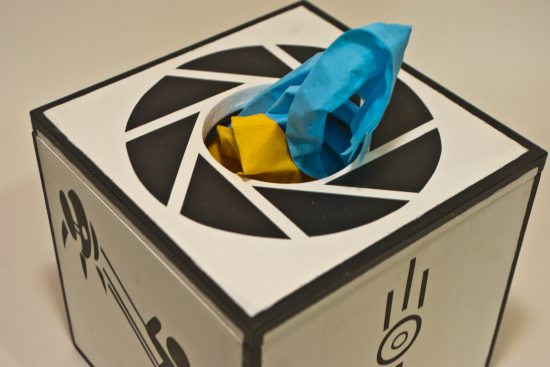
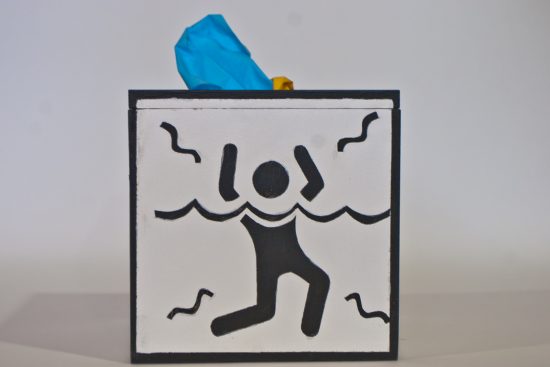
Aperture Laboratories [Portal Warning Signs]
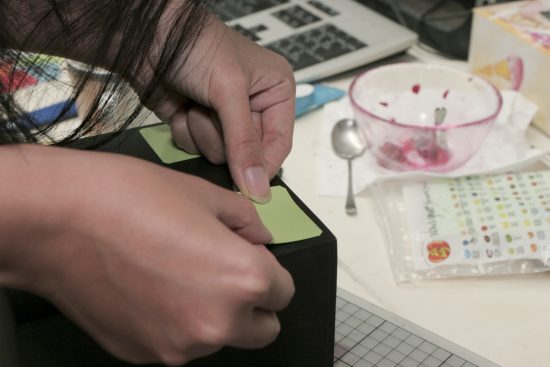
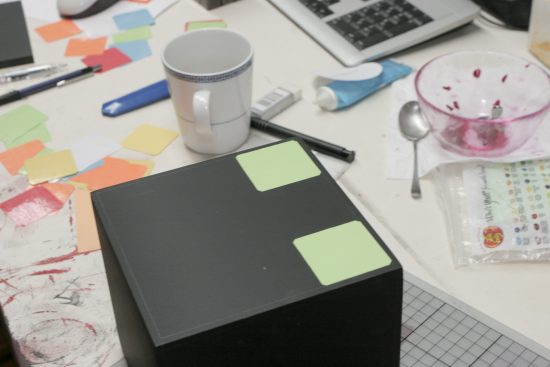
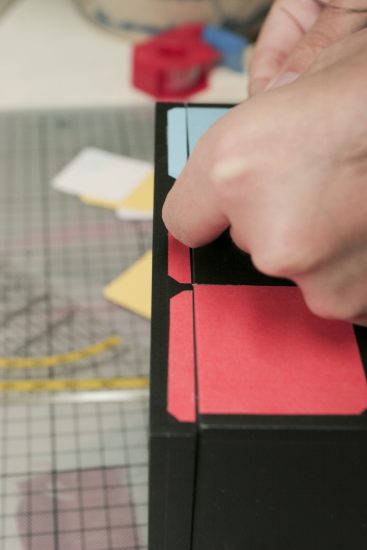
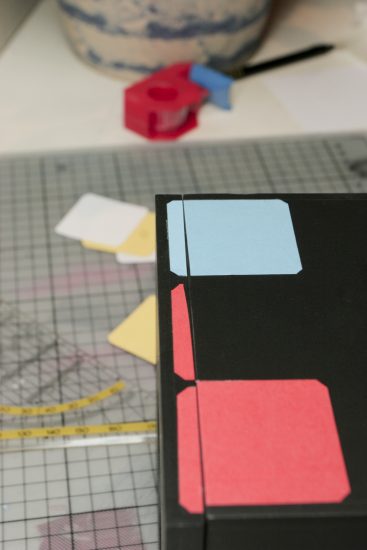
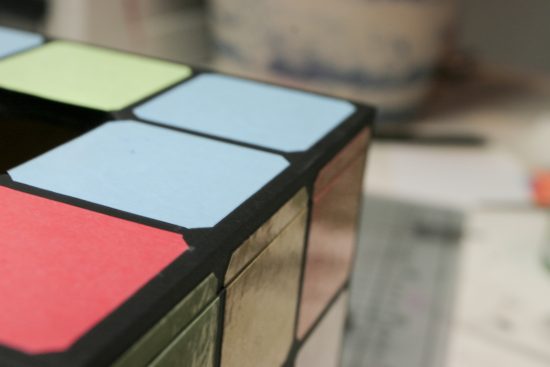
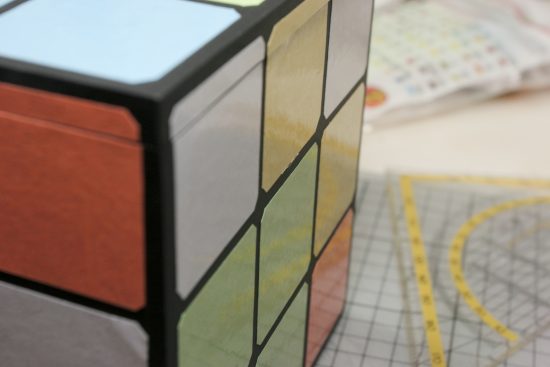
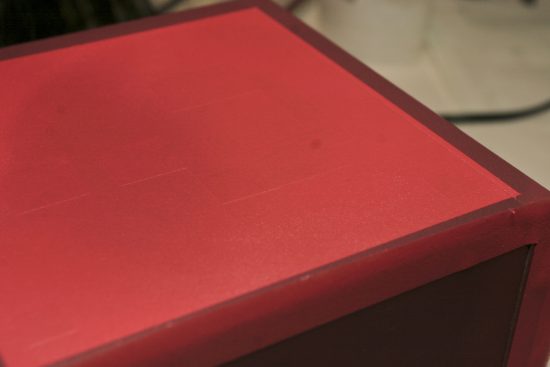
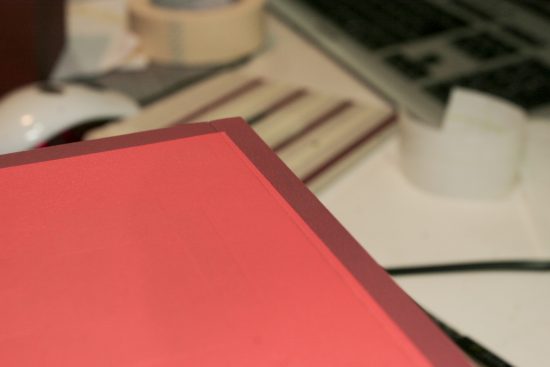
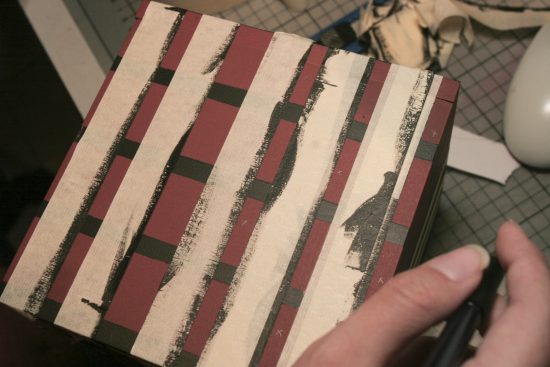
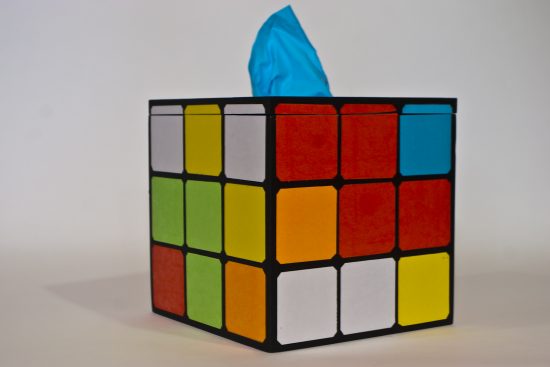
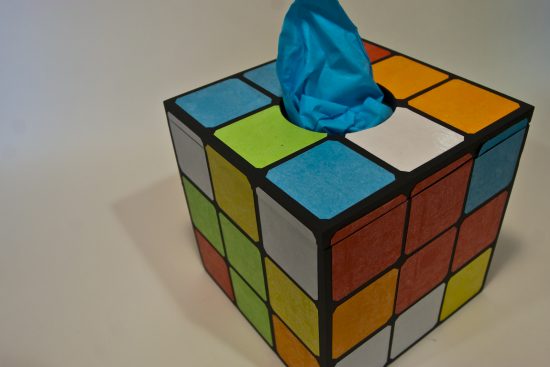
Rubik’s Cube
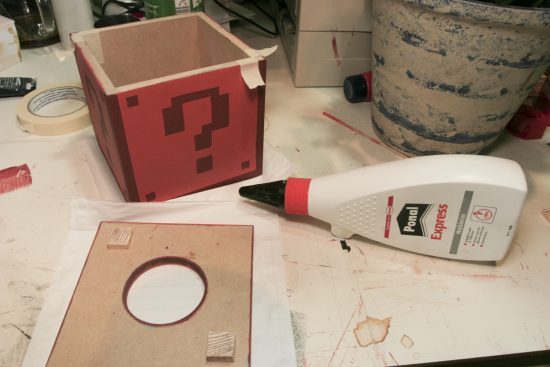
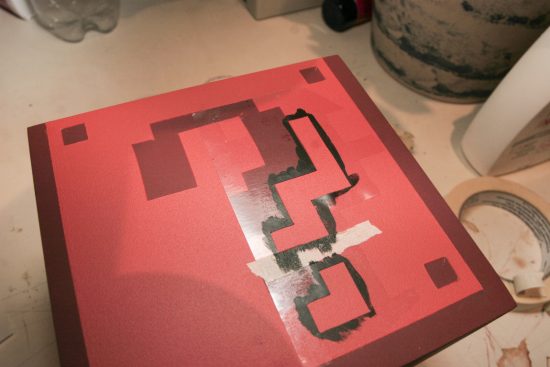
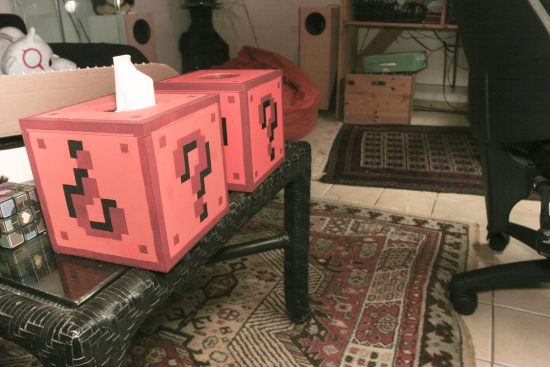
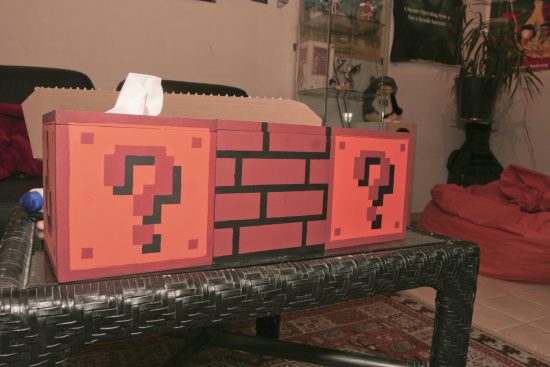
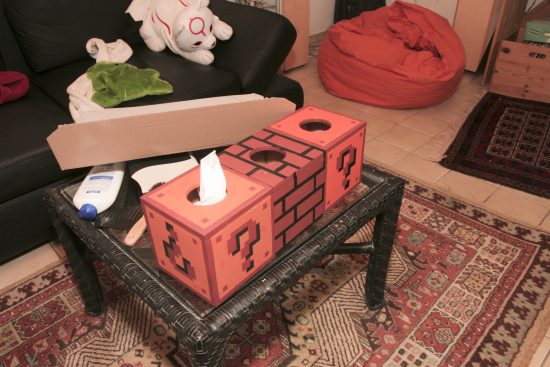
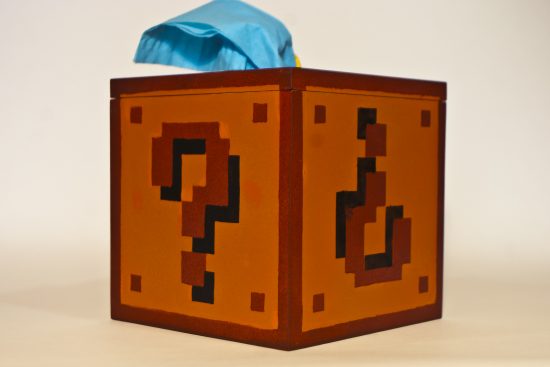
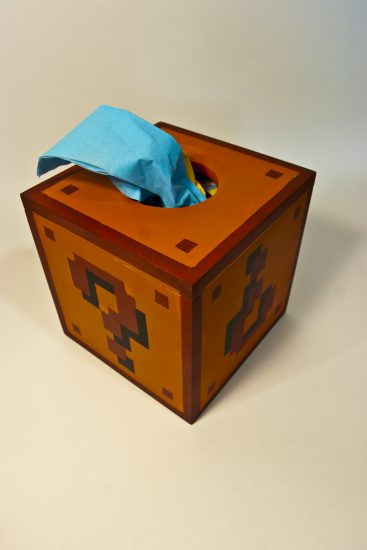
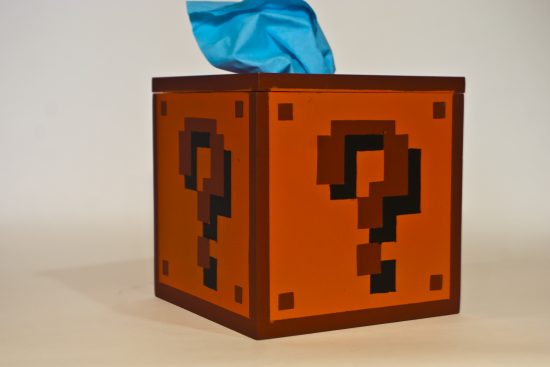
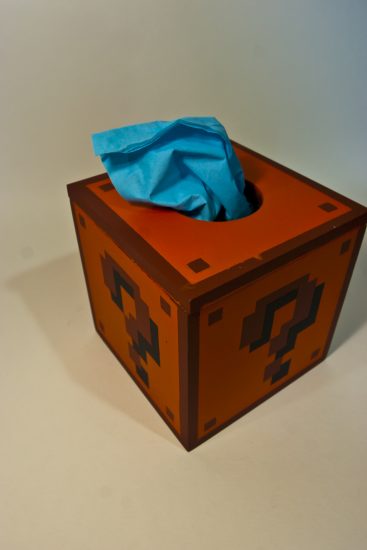
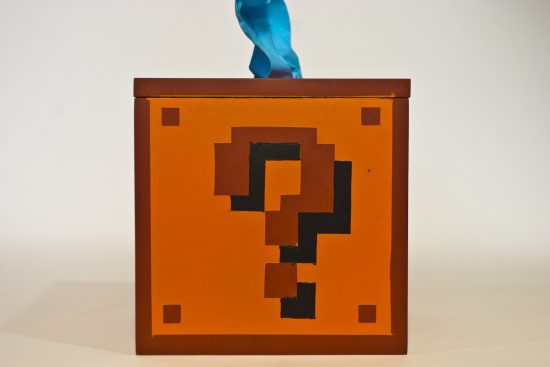
Mario Question Block
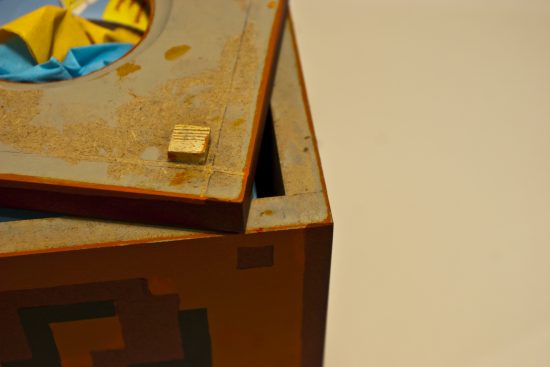
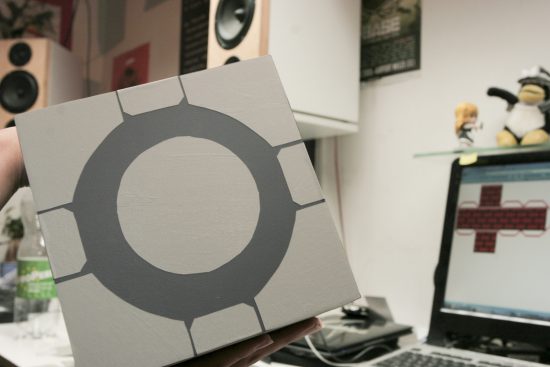
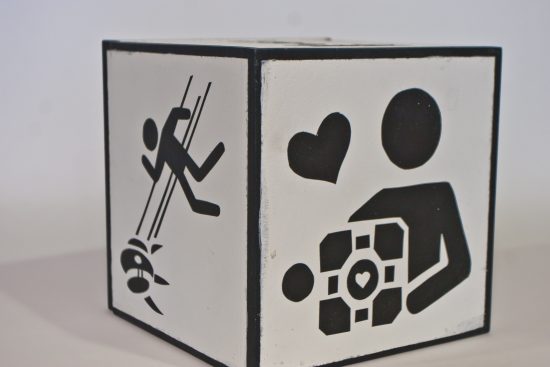
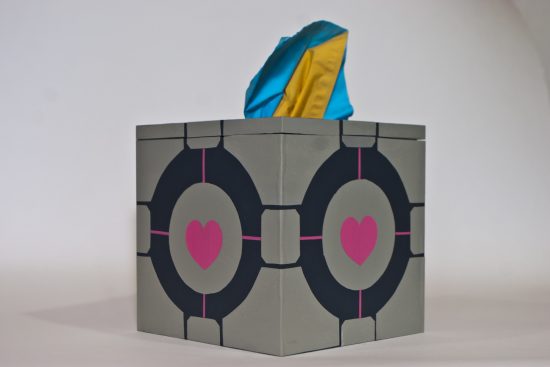
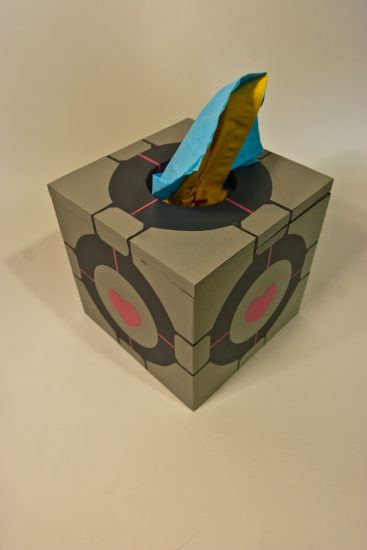
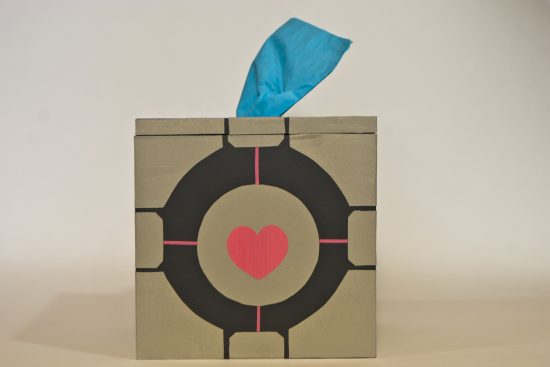
Companion Cube
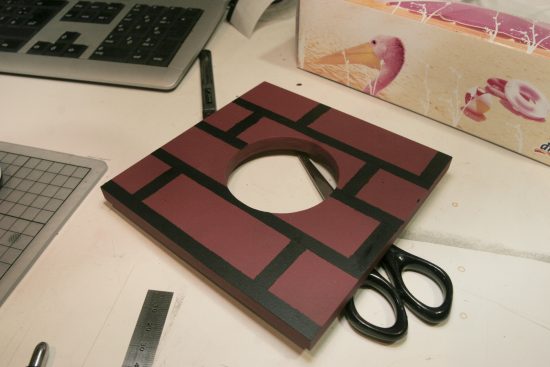
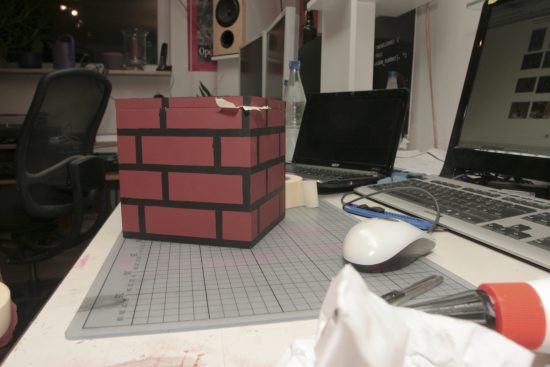
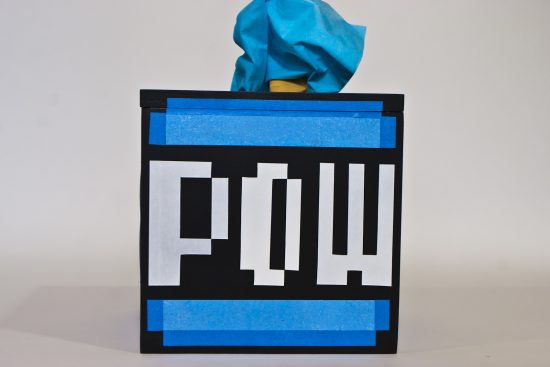
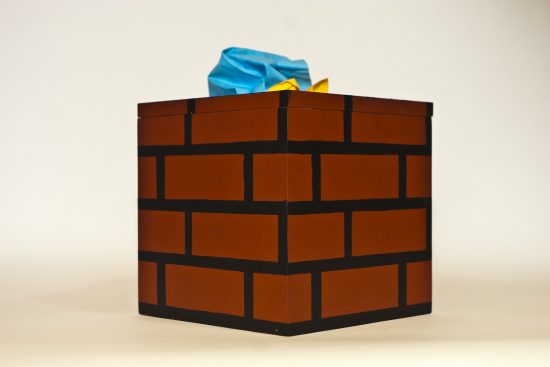
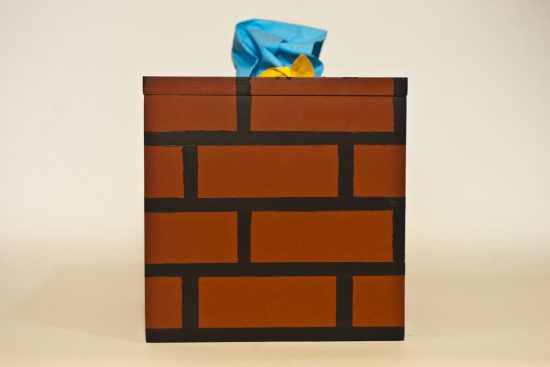
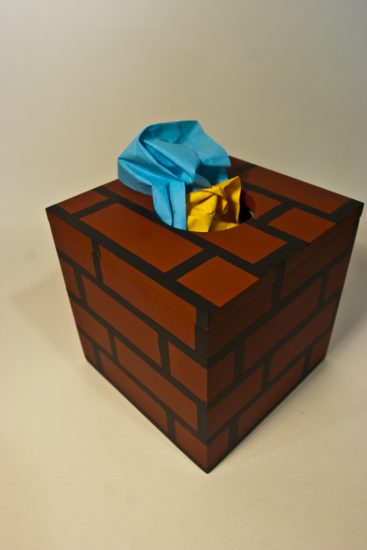
Mario Brick Block
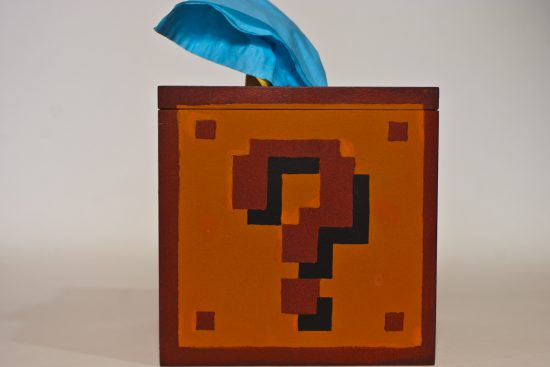
Mario Question Block [The 2nd one]
OMFG! WANT! 🙂 *putsMDFOnShoppingList*
Yay, thanks again! 🙂
WOW I would love to have one of those portal boxes hehe
WOW amazing!! Anyway I can buy two of the Rubik\’s cube ones?
Heyyas,
YOU HAVE … MAIL
Wow – any chance of a rubiks cube one for sale?!
Hey,
recently someone else asked the same thing. I was very eager to try and make a good offer, but sadly it would\’ve gotten quite expensive as i\’m missing some of the materials that you can only get (nicely) in larger quantities. I estimated that if i make a few (say, 5 or 6 pieces) then i could offer them at around ~40-45Eur. I do know this is quite a hand full of money, but on the other hand look at what commercial items which aren\’t produced in large quantities in this sector (check thinkgeek or the like :P) do cost.
So, yes, its possible – if i\’d ask around, find another few people who want one and are willing to pay so much :(.
I\’m sorry, regards
– Dario
Wow! Perfect christmas gift idea – a rubik\’s cube one going for sale!?
If they go cheaper I would love a Rubix Cube one :)!!
So, I\’d like to try and make the Rubiks cube for my hubby for Christmas. Can you share the dimensions of the colored squares with me? Thank you do much.
Heho,
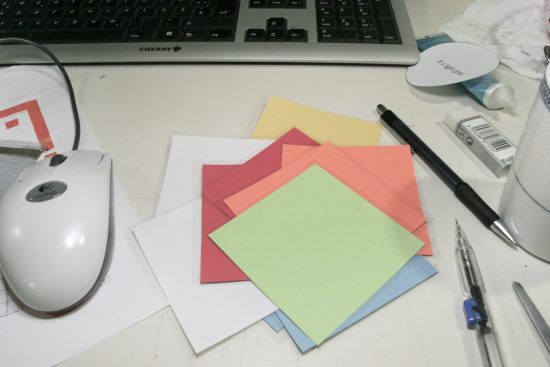
if you\’re using the same dimensions for the outer box as we are, ~45mm per square (the corners are beveled a bit, as you can (hopefully?) see).
Hope it helps, regards
– Dario
Thanks!!!!
Ever considered Minecraft blocks? I would definitely buy some of those! 🙂
Hey,
sorry to say so but not having played minecraft myself yet (and not considering it right now) i can\’t get myself to realize it :(. But using the techniques introduced here i\’d love to see some backscatter!
Also, as for the \”sale event\” right now we\’re looking for enough rubiks cube buyers (as those seem the most popular right now, probably due to the big bang theory tv series) so we can streamline making them at least a little. So sorry to say this, but i doubt i\’ll be able to make a minecraft block for a affordable price right now :(. Sorry!
I made that horrible mistake to start playing minecraft. Now I want a cube on my desk with a Creeper face. 🙁 Would love to try getting the pixel-design on the cube. Let me know, when you order the next batch of material. 😉
I want a rubix cube one please. Email me details please. Thank you
What, no Menger\’s Sponge?
I want a rubix cube one too. Email me details please. Thank you
I also would like to purchase a rubiks cube tissue box, can you please email me info. Thank you! 🙂 felicia
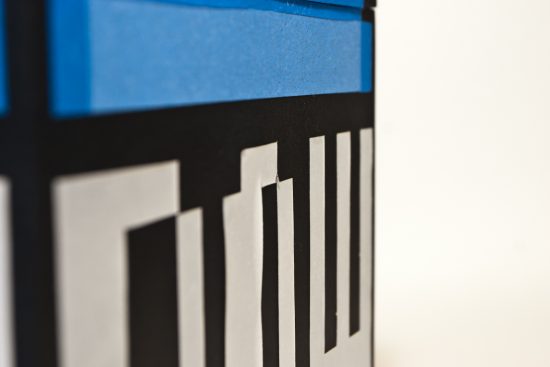
I would love one of the Mario Pow Block\’s. How much are they?
Please e-mail me back when you get a chance! Thanks! 🙂
Hey,
sorry, we currently only build those rubiks cube boxes. See our latest post for info.
Hi,
I would love to purchase a rubik\’s cube tissue box, can you please email me price/info. Thanks
Why not permanently attach the top of the box and have no bottom? you could just slide the cover down over the box.
Hey,
we kinda often relocate our boxes, and having no bottom would be impractical for that scenario, as the tissue-box would just fall out. But yeah, if you leave it quite stationary thats a good idea. Now that i come to think of it, maybe a strip of velcro, or even simpler, four thumbtacks and a length of thing sewing thread would do the job too?
Thanks for your input ;P
Man, everyone wants a rubik\’s cube! My favorite is the companion cube!
Yeah, I would love the companion cube. Any chance those could be sold as well?
Nice work guys!! These cubes are amazing. You can see the love that went into each of them. I featured you on our site – http://whydontihavethis.com/gaming-geek-tissue-boxes/
How much do the two Portal boxes cost?
Hey,
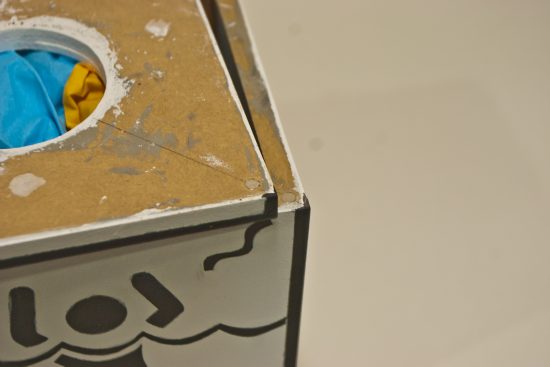
with all you guys asking for Portal Boxes, i have a sad announcement to make: We do not know how to manufacture them for an affordable price! The specimen seen here are made of wood, hand-painted and hand-laminated with foil. This makes them quite expensive to manufacture as i need wood, glue, magnets, i need to cut the wood on my tablesaw which takes time, need to putty and sand it multiple times, then base-coat it, sand again, apply color, laminate foil. This takes a quite a few hours for every box, and the end-price would either rip us off, or you — and both is unacceptable.
This led us to try another technique using the same cardboard boxes we use in:
http://blog.kanojo.de/2011/11/29/rubix-cube-tissue-box-take-two/
Unfortunately this didn\’t work as well for the companion cube as for the rubiks one. The quality just wasn\’t as nice: The colored paper we used starts to loose its silver gloss to your fingers, the cut-out paper doesn\’t look quite good, etc…
So with your renewed interest in those we can try to find new, better materials, maybe start cutting the paper on our plotter and see if we can increase the quality while keeping the cost reasonable. We\’ll try, but we can\’t promise when or if. Sorry!
Best Regards, and Thanks for all of your interest!
Hey I would like to purchase a question block box. Please email me at ugleecassanova@gmail.com & let me know the cost & where/how to pay you (if it\’s still available).
Thank you!
Matt
Hey,
same as for the portal-cubes — we only have rubiks cubes for sale ATM, as the others are too time-intensive to mass produce and thus would get absurdly expensive. I\’m sorry! And again, with the renewed interest, we\’ll try new plotter-laminating-foils and see if we can fiddle out a technique that allows us to. Please be patient ;P.
Do you guys make any LOTR themed tissue boxes? I like Mario but am a total J RR Tolkien fanatic. I\’m what you would call a \’Ringer\’
Hey,
while i\’ve only read the books and never watch films of books i\’ve read (yes, there still are those people ;P), i can\’t recall that somewhere a cubic~ish object is described. Thats why the idea of making a hobbit/lotr-themed tissue box never crossed my mind.
As a \”Ringer\”, what idea for a themed tissue box do you have? Suggestions warmly welcome ;).
I would like to purchase one of these tissue boxes. How can we make this happen? Thank you.
Please kindly read the top of this post and refer to our sales thread:
http://blog.kanojo.de/2011/11/29/rubix-cube-tissue-box-take-two/
Thanks!
how can i buy them? please reply as i would want to buy in large quantities, and do you ship in the UAE?
Hey,
i\’ll mail you! Thanks.
Dude, you should make a minecraft block one
can you ship to the United States of America? What is the cost in US dollars? and how do I go about ordering? Thinking Rubixs cube or possibly Mario Question Block.
thanks,
e
Hello,
we currently only make Rubiks-Cubes. Shipping to USA is possible, for ordering, pricing and shipping costs please consult our sales-thread:
http://blog.kanojo.de/2011/11/29/rubix-cube-tissue-box-take-two/
Regards
Hello. These look amazing and I\’m thinking of making a couple myself. I looked through all the pictures, but I didn\’t see how you keep the top on when someone gets a tissue. I saw magnets mentioned someone in the comments… is that what you used? I thought of putting hinges on them, but it would out of place. These boxes (minus the hole) would also make excellent decorative storage boxes, or you could make them larger, add a cushion, and make a storage ottoman/seat (thought I expect you\’d need to do more than just glue the pieces together if they\’re taking that kind of abuse). Anyways, now you\’ve my urge to build started. Who knows what\’ll happen now.
Hey,
yes, we do use magnets to keep the top-pieces on. One very simple alternative would be to glue the top, but leave the bottom open and just put it \”over\” the cardboard-box holding the tissues.
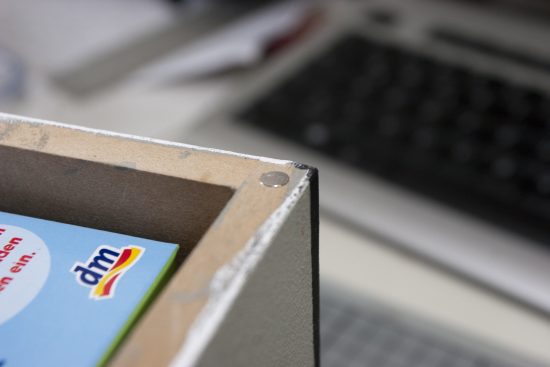
As for the magnet method: The magnets are sunk into these four holes:
http://blog.kanojo.de/files/2010/12/IMG_9700-550×366.jpg
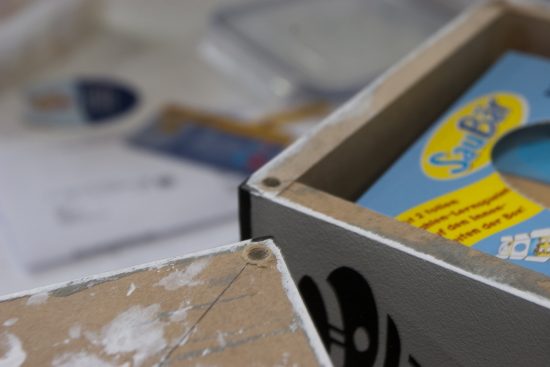
like this:
http://blog.kanojo.de/files/2010/12/IMG_9698-550×366.jpg
Be sure to use a good, very sharp drill and drillpress to drill those holes, as they will easily yank out (right word?). In the most cases its not even necessary to glue the magnets, as they fit quite snuggly into the holes. Also, be sure to use those neat neodym \”supermagnets\”, i doubt regular ones would keep the top on the box when you violently grab a tissue.
As for the sitting boxes … i don\’t think it\’d take that much more. I\’ve build speaker-stands and did nothing but glue the parts together (properly sanding them before, also took care that the edges i cut were completely parallel and no slit was visible between them) — after drying them properly clamped together (and that means tons of force!) i could jump around on them. True, they weren\’t quite large (~35cm height), but well … for a large sitting box you might want to consider some wooden dowels and/or an additional stabilization ledge on the inside — but thats about it.
Have fun building something nice! Glad you like our idea! I\’d be honord if you reported back once you\’re finished with your ideas.
Hey,
I would like the instructions for the portal one please.
Hey,
we\’ll be glad to help! However, what exactly is it that you need? Please be a bit more specific on where you need help, then i can try to help you ;).
Thanks
hey i would like the templates for the portal apeture warning signs please (im using spray paint)
Hey, sorry for the late answer but you can find the svg file for the warning signs here: http://blog.kanojo.de/2010/01/04/portal-level-warning-signs/
Resize them for your cube and good luck with your project!
Hey, i think this is very cool and i would like to make my own. How did you make the question block? did you use a certain templete or did you do it by hand?
Hey,
cool to hear! I hope you\’ll succeed with your project!
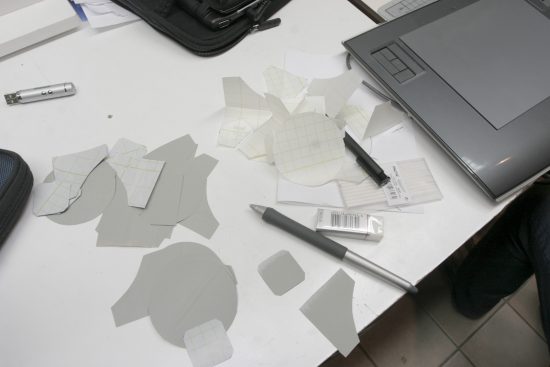
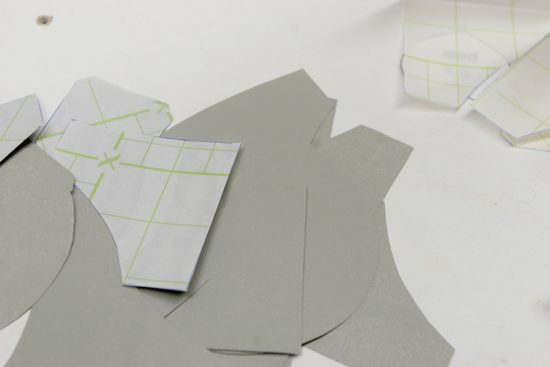
As you can see here: http://blog.kanojo.de/files/2010/12/IMG_9648-550×366.jpg we use a clear adhesive foil that we have cut out to match the \”?\” of the block, we have another one for the shadow, one for the edge, …
The cutting of the clear adhesive foil was a bit of a hassle. In the meantime we have a cutting plotter, so we\’d probably auto-plot. But if you have a steady hand, a good cutter or hobby knife (!!), you can make it in as little 20-30minutes or so.
If you have further questions, we\’re here to try to answer ;). Best of luck, and Regards
– NebuK
thank you very much for the reply and advice.
Well, I just want you to email me the instructions to build the portal one that\’s NOT the companion cube. The one with signs all over it.
Hey,
for the Portal Signs we traced the warning sings from a screenshot from the game and cleaned them manually. You can find a vector download here: http://blog.kanojo.de/2010/01/04/portal-level-warning-signs/
These then have been cut out from masking tape/foil, the mask glued to the wooden encloser box, and then painted very very carefully so that no paint reaches under the (only slightly adhesive) masking tape/foil.
As said in the comment above, cutting this manually can be a bit of a hassle or patience-job, but with just a tad of patience you can achieve great results! An feasible alternative would be to check local copy and plotting shops and asking whether they can plot you a set of decals/templates from masking tape using a cutting plotter. That also shouldn\’t be overly expensive.
Hope this helped, for more details, please ask again ;). Oh and, one comment is usually enough for us to answer ;P.
Regards and Good Luck!
Hey, is the portal warning sign one made with decals?
Uh, both. We first tried to apply stencils and paint it but the edges didn\’t come out as clean. Since you have to cut out the forms in both methods it\’s better to use decals. They were hand-cut which takes some patience but it\’s doable.
Thanks for all the pictures and info on making these. I just made some with my dad for Christmas gifts. We modified the design of the box slightly to have the bottom piece fit inside the box rather than under it so it will retain its box shape. I will be doing a Minecraft one for my husband to keep on his desk at work. I would love to share pictures of it when I\’m done.
Hi,
wow, cool! I\’d love to see some pictures of that. Fitting the bottom part inside is a good idea — did you put the magnets inside the inner surface of the side-walls and cutting-edge of the bottom board then? Or is it just made to be put onto the bottom board? Both sounds like its rather convenient to use…
Good work! Waiting for pics ;P.
We haven\’t put magnets on them yet. I saw that last night and was going to ask my dad about that today. The lids sit on top but the bottoms are inside, as you know that way the lid can be lifted to change tissues. I should take some pictures of them in their current state.